18 May, 2011

The Folded Card Tutorial

Hello everyone!

Today i will show you how to make such a folded card: 


Inside of a card there is a pocket for money, a small present or/and a tag where you may write your congratulations and wishes:


And here it comes a tutorial:

1. Fold a paper as it is shown on a picture under. Simply mark middle point on every edge and fold accordingly. I used double sided paper form Prima. The size of a paper is 20x20cm. You may use any size of a paper but it has to be square.  


2. Prepare the pocket for oyur card. I used a triangle pocket.


3. Apply glue only on edges of a pocket.
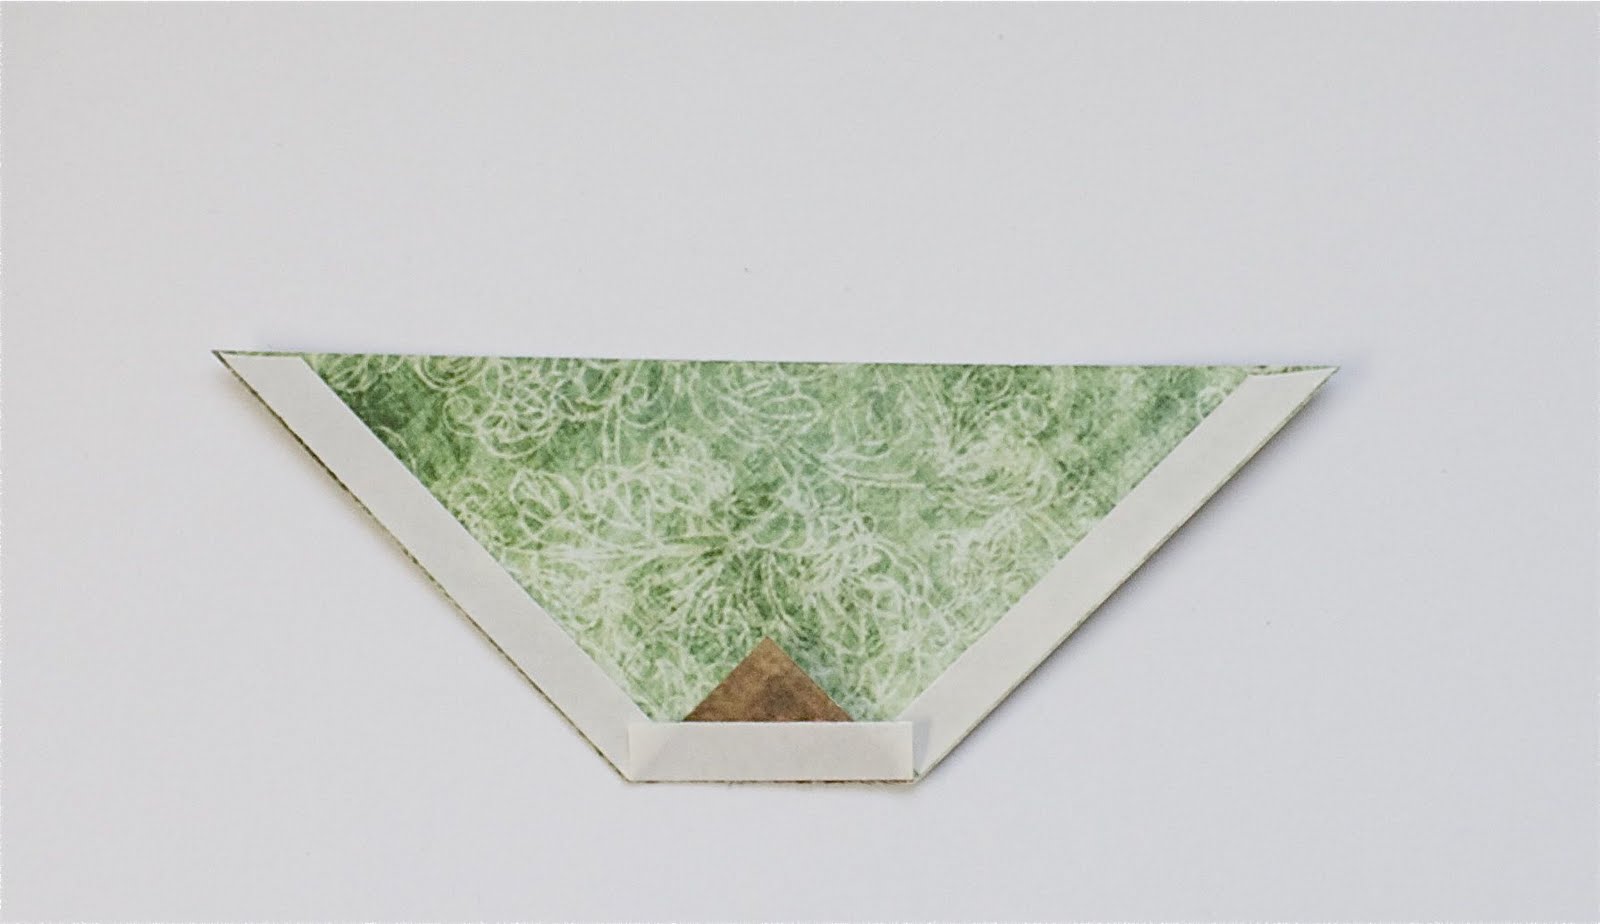

4. Distress edges and glue a pocket on a card.


5. I made a tag and decoratet an inside of a card at this point, but you may do it at the end...


6. Make a top cover of a card. Mine is size 14x14cm.


7. Glue the top cover on one of the corners of a card.


8. Glue a ribbon to the backside and top cover of a card.


9. I used one more layer of a paper on a top cover. Now the card is ready to be decorated ...


10. When you are done with decoration simply fold a card and tie a ribbon. Here is your card ready :)


Have a nice and creative day!

13 May, 2011

Box-card "Til Konfirmant"

Hello everyone!

Here is me again presenting you a box-card "Eskekort til konfirmant". Do not forget that Kortgleder has a challenge for you - "Konfirmasjon". 

I used the motiv FEMA005, dies MFD026 og clippunch alphabet flower CP020 from Nellie Snellen.


And a small card is hiding under the text, he he...


With this box I also enter the challenge at Papirdokkene "Alt er lov" or "everything is allowed". Hope those girls will like my little box-card, he he...

Have a good weekend!

11 May, 2011

A Flower Basket

Hello again!

Today is a day when a new challenge starts at Anonyme Scrappere. And this time the challenge is "THREE (3)". It means that three things have to dominate on the creation, like: 3 papers, 3 flowers, 3 ribbons, 3 pearls, 3 stamps, etc. Even if it is a minimalistic creaiton, it has to be something 3. And it has to be writen on your blog, which things are 3 on your creation.

Here is my contrbution: A Flower Basket. Something a little bit different for a birthday present.


I used:
3 papers
3 stamps
3 punches
3 roses
3 rosebuds
3 leaves
3 butterflies
3 ribbons.

And even 3 types of glue, he he...


From a top with a present inside:


Have a wonderful and creative day!

A Card "Til Konfirmant"

Hello there!

Today I will show you a card "Til konfirmant". 


It is a napkin folding card I made for OVA new challenge "Napkin card". This time the challenge sponsor is The Craft Barn with a £20 voucher to spend in their store!


As well these two weeks we have 'til konfirmat' weeks at Kortgleder. And this card is made for this occasion. 

I used edge dies MFD 019 for the front page around the picture and ribbon, dies MFD014 for the text window and corner dies MFD027 from Nellie Snellen. I embelished a card with Strass stones from Nellie Snellen. The edges around the card made with MS punch. The text stamp is from INKIDO, and papers from BG and 7gypsies.


Have a most wonderful day!

02 May, 2011

LO "Angel" (DT OVA)

Hi everyone!

Today is a new day and Our VIntage Affair has announced a new LO challenge. This time a challenge is all about using THREE LACES (not ribbons, but laces) and a SKETCH. Here is my take on a challenge LO "Angel". 


This LO "Angel" is also made for Papirdokkene challenge #2 "Scrap a song". This time is was Chris Medina "What are words".

I used BoBunny paper, but simply cut out the different color layers, so it would look like I used three different papers. The photo is of Ulrika when she was 2. When she looks at me with those innocent eyes, I feel blessed, like it says in the words of the song:

"...I know an angel was sent just for me..."

Thanks for visiting!

29 April, 2011

Tutorial - Nellie Snellen Bird Stencil

Hello there!

Today I will show you one more tutorial with Nellie Snellen Lines and Dots Stencils. 

I used Lines and Dots stencil LD006 Bird from Nellie Snellen.

1. Paint the whole stencil plate with ink pad. I used fast-drying pigment ink. 


2. Turn the painted side of a stencil on to a paper. Use adhesive tape to hold the stencil in place.
3. Use your die cutting machine to emboss the paper.


4. Remove the stencil and your picture is painted and embossed.


5. I covered the whole picture with Perfect Pearls to get that shinny pearlized look.


6. Cut out the picture in a shape you wish and it is ready to use in your projects.

I also used edge die MFD028 and Strass Stones from Nellie Snellen for this card.  


Have a wonderful and creative day!

26 April, 2011

Tutorial - Nellie Snellen Flower Stencil

Hi there!

Today I wil show you the tutorial about how to use Nellie Snellen Lines and Dots Flower Stencil. Those stencils are so beautiful and so praktical, and you can use it in many ways. They produced from light metal, are durable and easy to use. Here I will show only one of many ways how to use it.


I used Nellie Snellen Lines and Dots stencil LD007 Flower-1. 

1. Emboss paper using the stencil.


2. Use an ink pad to color all openings.


3. Cut out the leaves of a flower along the lines and shape it to lift it. 


Now your flower is ready to use in your projects.

I also used MFD025 and Strass Stones from Nellie Snellen. Entire card is covered with Perfect Pearls and decorated with flowers and a ribbon.


Thanks for visiting!

Have a nice and sunny day!

21 April, 2011

LO "Baby Feet" (DT Kortgleder)

Hi there!

We at Kortgleder desided to have a lifting-our-followers-project! Everyone chose their favorite to lift one of works. I chose Linda or Scratch  to lift this time. She is one very talented and creative scrapper so just pop into her blog and say hello to her! I bet you will find some inspiration there!

Here is my creation LO "Baby Feet" 

And here is the LO of Linda's I liftet:


Have wonderful Easter Days!