Hello everyone!
Today i will show you how to make such a folded card:

Inside of a card there is a pocket for money, a small present or/and a tag where you may write your congratulations and wishes:

And here it comes a tutorial:
1. Fold a paper as it is shown on a picture under. Simply mark middle point on every edge and fold accordingly. I used double sided paper form Prima. The size of a paper is 20x20cm. You may use any size of a paper but it has to be square.

2. Prepare the pocket for oyur card. I used a triangle pocket.

3. Apply glue only on edges of a pocket.
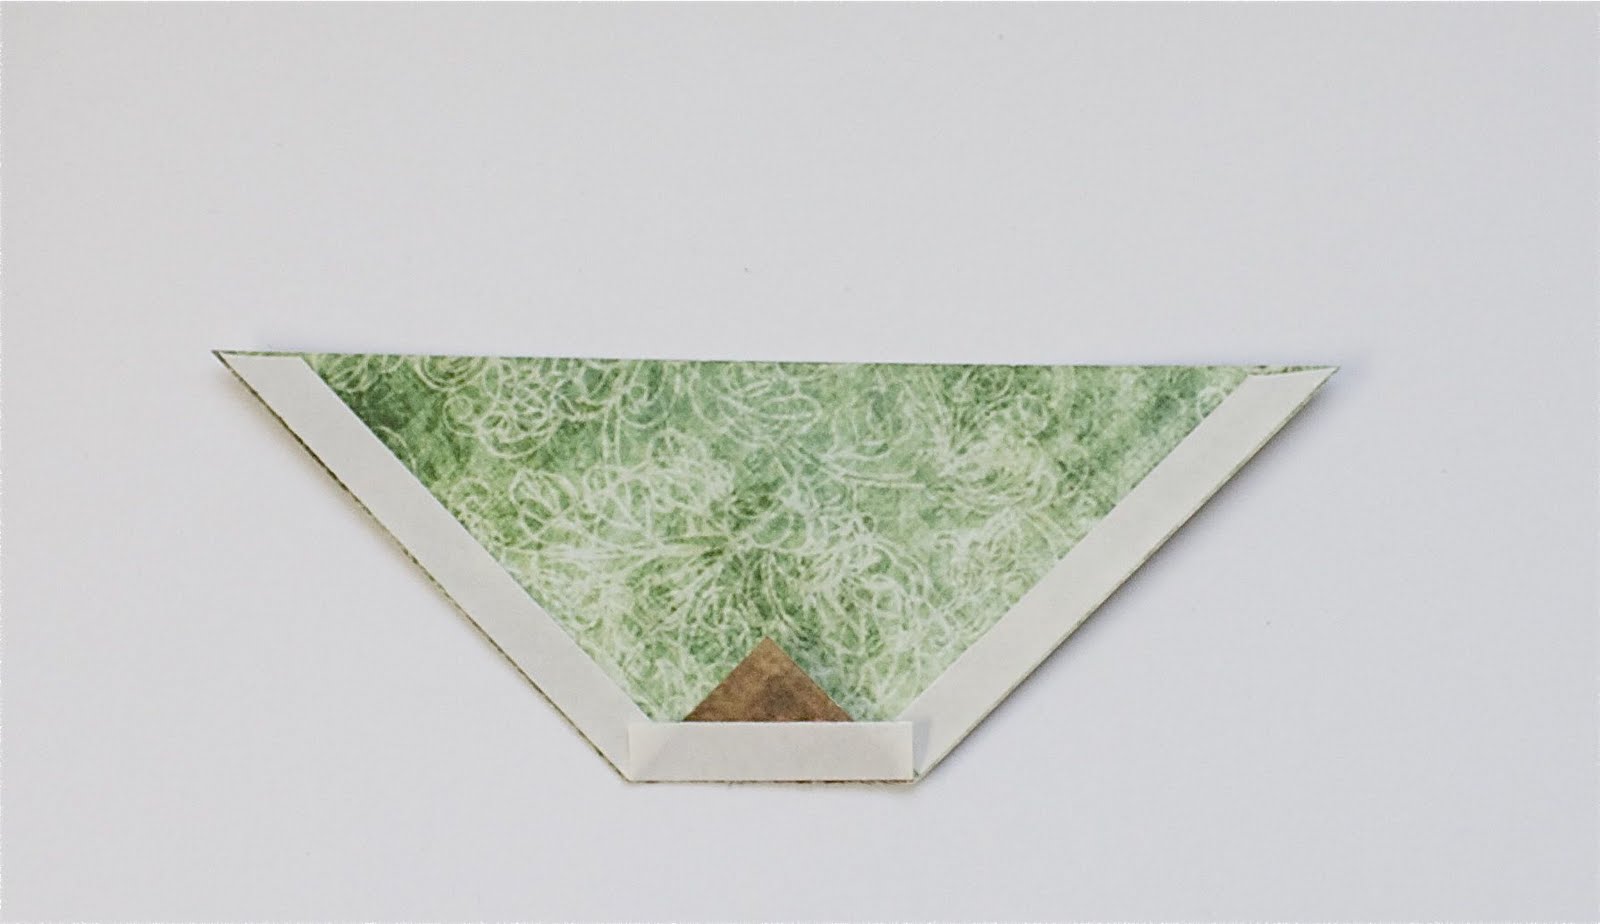
4. Distress edges and glue a pocket on a card.

5. I made a tag and decoratet an inside of a card at this point, but you may do it at the end...

6. Make a top cover of a card. Mine is size 14x14cm.

7. Glue the top cover on one of the corners of a card.

8. Glue a ribbon to the backside and top cover of a card.

9. I used one more layer of a paper on a top cover. Now the card is ready to be decorated ...

10. When you are done with decoration simply fold a card and tie a ribbon. Here is your card ready :)

Have a nice and creative day!
For et nydelig kort, og en veldig flott bretteteknikk!
ReplyDeleteTusen takk for inspirasjonen. :)
Klem, Anne.
Thank you! this is a terrific map and so quick and easy to do it!
ReplyDeleteWooow så stilig.
ReplyDeleteDette må jeg prøve.
Ha en fin kveld.
Klem Connie
Tusen takk for en flott brette ide:-) og et nydelig kort.
ReplyDeleteAdorei esse estilo também! Vou tentar fazer!
ReplyDeleteSo .. wonderful... love the vintage style....
ReplyDeleteWau gras, suintrigavo, nes labai paprastai cia viskas !
ReplyDeleteAciu
Knopkiniukai
I love it! I'm going to try to make it.
ReplyDeletewonderful handcrafts!!!!!!!!!!! and fantastic candy of OVA !!!!
ReplyDeletekisses from Italy
Tusen takk for en flott tutorial !! Lekkert bl det, så denne må jeg nok prøve meg på.
ReplyDeleteTakk frat du tar deg tid til å dele inspirasjon på denne måten.
Ønsker deg en god sommer,
Klem, marianne
cool! thanks for sharing!
ReplyDeleteWauw! Aivan ihana kortti;)
ReplyDeleteNydelig kort. Tusen takk for oppskriften :)
ReplyDeleteKlem
Pas tave uzsukus niekad nenuobodu - pilna visokiu ideju, groziu ir ikvepimo - aciu.
ReplyDeletebeautiful!! I love your blog!!
ReplyDeleteI love this card! Thank you for sharing a tutorial with us. I made one and posted it on my blog with a link back to you: www.porchswingdesigns.blogspot.com
ReplyDeleteMarilou
OMG! This is amazing! I've never seen anything like that before.
ReplyDeleteBravo et merci pour ce tuto , la carte est magnifique. Bisous
ReplyDeleteFélicitations cette carte est superbe, merci pour le tuto, je viens de la réaliser, je vous mets le lien :
ReplyDeletehttp://scrap-adrigane-athena.over-blog.com/article-carte-pochette-carte-recue-blog-candy-scrap-desirs-103320154.html
Bonne soirée.
Athéna
Merci pour ce tuto bien sympathique! Bises. Nadine
ReplyDelete